The Zebraman Costume
Todd Murray – July 2008
Background
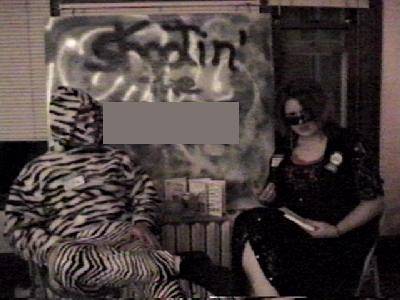
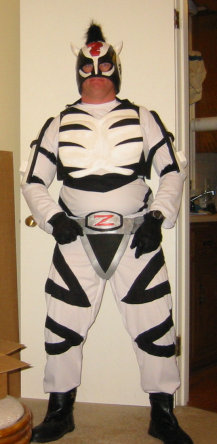
Back in 1991, one of my coworkers was having a Halloween party at his place. Since it was 1991, Zubaz pants were still hot. (So were the original Oakley Blades sunglasses, glam rock, and hot pink.) Being low on ideas, I came up with the original Zebraman costume. I made a zebra-stripe shirt and hood and paired them up with the Zubaz pants. Here’s the result, as modeled several years afterward at a different friend’s party (and censored slightly for posting on the Web):
I put this on an original version of my personal Web site. Shortly after CONvergence 2007 completed, I did a Web search for “Zebraman”. To my surprise, this silly costume didn’t show up. Instead, my search brought up a Takashi Miike movie, Zebraman, about a mild-mannered Japanese school teacher obsessed with Zebraman, a character from a 1970s show that got cancelled after only seven episodes. The teacher makes a costume based on his recollections of the character. It turns out that one of his students is also a fan of the Zebraman show, and that he’s seen it on an Internet fan site. The teacher decides to put on the costume and start skulking the streets late at night, so he can show it off to his student. He ends up biting off more than he can chew, though, as he immediately starts encountering strange characters who are bent on killing him. Zebraman is immediately thrust into fighting with these characters, who are possessed by a strange green alien force.
The film is a brilliant piece of satire, spoofing science fiction and tokosatsu films, cheesy 1970s kids’ TV shows, Internet fan site obsession, and escapism through comics. In other words, it would make a great CONvergence costume.
My Costume
I’m aware that there’s sort of a strange meta-superhero thing going on with my entry. I’m making a costume based on a movie of a guy who made a costume based on a fictional 1970s TV show. And, I found out about this movie through the Internet. This whole concept is starting to work circles around in my brain as well.
I originally wanted to make the Zebraman costume as a hall costume while I learned some plastic and silicone casting techniques that I could use in my next real Masquerade entry. Well, the Zebraman costume sort of took off on me.
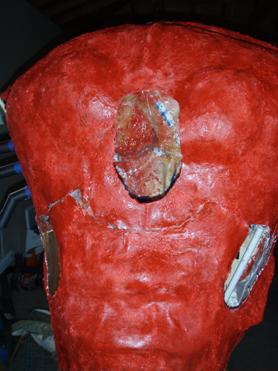
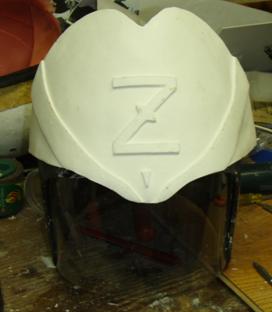
The Mask
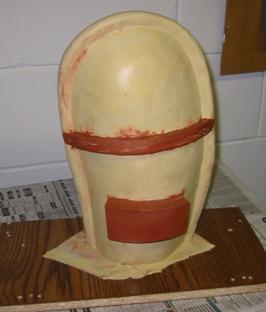
First, I started off making a latex mask, using the same processes I used to build last year’s Gamera mask. I made a sculpture from oil-based clay, then I used Ultracal 30 (a specialized type of plaster) to build a cast around the clay. Actually, I did this in two sections, so I could take them apart and get the mask out. After removing the clay, I cast the mask by pouring liquid latex mask compound into the plaster cast and leaving it to set for about 40 minutes.
|
|
Here’s the original clay sculpture. |
|
|
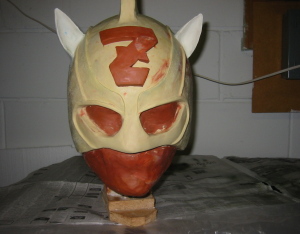
And here’s the result of casting the latex the first time. Unfortunately, the left ear had a massive air bubble in it, so it didn’t get cast properly. I had to cast another ear separately and then glue it onto the original mask. |
|
|
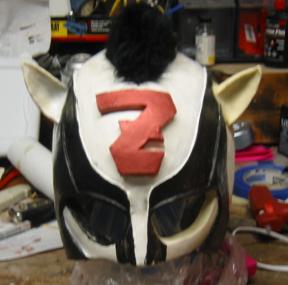
And here’s a picture with the new ear attached, while I’m in the process of painting it. I think this was the old mane. (Not to be confused with Old Main, a building at countless colleges and universities.) |
I actually had this mask in progress for last Halloween, sort of as a preview for what I had cooking in the shop. (Well, not literally cooking.)
Zebra Codpiece
Let’s face it: A lot of superheroes leave their, um, junk exposed. I’m not sure what Superman or Spider-Man would do in a fight if some villain decided to go below the belt on a costume made of just a thin sheet of Spandex. Besides, the guy who built the Tron Guy costume found out the hard way that you need to cover yourself with something that doesn’t fit to form, or else you’ll be ridiculed to death on the Internet.
For whatever reason, the film shows Zebraman with a big belt buckle and codpiece. I made that my first experiment in using silicone mold casting techniques.
|
|
I sculpted the original belt buckle out of oil-based modeling clay. |
.
|
|
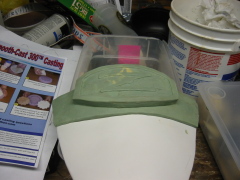
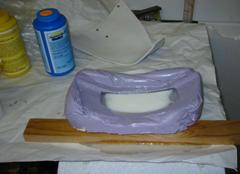
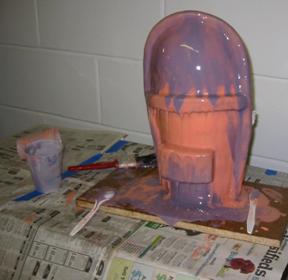
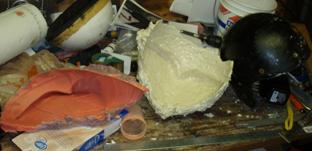
I put the sculpture into a box and started pouring Smooth-On’s silicone rubber into it to create a mold. |
|
|
Here’s the mold box about halfway full. |
|
|
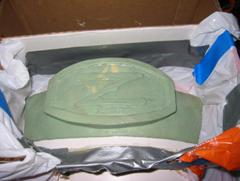
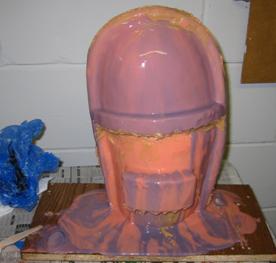
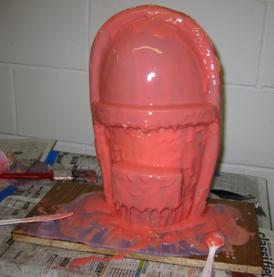
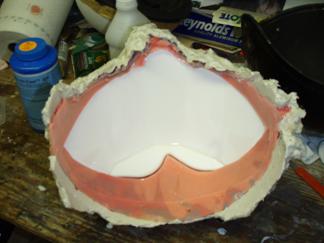
Here’s the inside of the completed mold. |
|
|
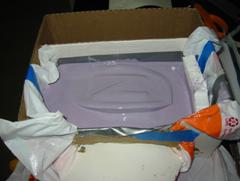
And here I am filling it up with Smooth-Cast 300. It’s easy to mix: one part of the Part A (yellow container) to one part of the Part B (blue container). |
|
|
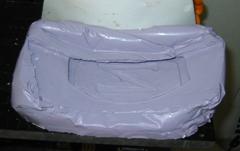
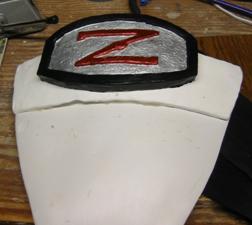
And here’s the finished (well, halfway finished) product. Zebraman’s nutsack is safe. |
Chest Armor
I took a piece of PVC foam (sometimes also known as Sintra) and cut it to shape, then heat-molded it to the approximate shape of my chest. Then I used that as a guide for making a clay sculpture of the chest armor.
|
|
You know, I could have pretended that I was enjoying this. |
|
|
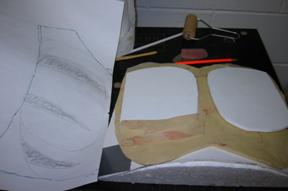
Here’s the first layer of the chest carving, along with a layer of foam to sort of bulk things up. And, the drawing on the left is my pattern. |
|
|
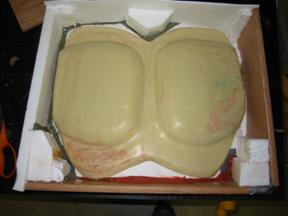
Here’s the completed chest armor sculpture in an improvised mold box, ready for pouring silicone. Silicone rubber is expensive, and this particular mold box took a lot of silicone to fill. |
|
|
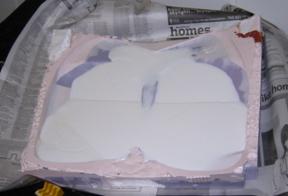
This is midway through the plastic mixing/pouring process. I had to tilt the mold around several times so I could get a piece of armor that would fit the Sintra plate and curve to fit my chest. |
|
|
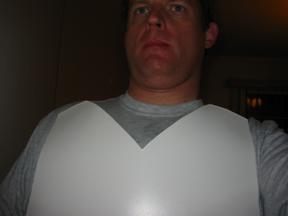
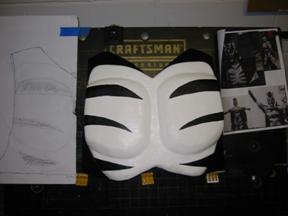
Here’s the finished cast after I painted it, along with pictures for inspiration. |
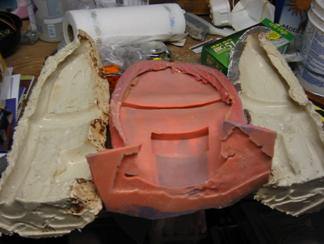
Shoulder Armor
When I did the shoulder armor, I sculpted that from clay, using a form that I built from a plaster cast of my shoulder. Rather than building a mold box and pouring silicone into it, though, I used Smooth-On’s Rebound 25 silicone rubber, which is a brush-on product. It ends up taking more labor than pouring a mold, but it has the advantage of not using so much silicone.
I had to first brush on several coats of the silicone rubber, with a waiting time between each coat to let them dry. Then, since the silicone would have flopped around all over the place without any support, I had to build a plastic support shell for the silicone. Smooth-On makes kits that contain the silicone mold rubber, the plastic support shell, the plastic casting compound, and instructions. They don’t supply the artistic know-how.
|
|
The left shoulder sculpted out and ready to go. |
|
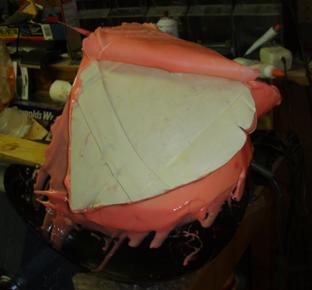
|
The first coat of silicone (in pink), with the second coat (in purple). They tell you to color every other layer so you know how much you’ve put on. |
|
|
The tannish-looking silicone at top and under the two protusions is thickened with Thi-Vex silicone thickener, which is supplied with the kit. This is to keep the silicone from running away all over the place. |
|
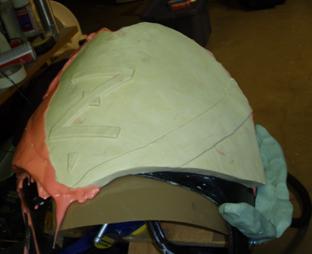
|
Here’s the finished sculpture with three or four coats of silicone in place. |
|
|
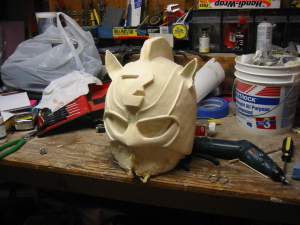
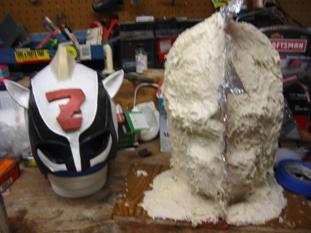
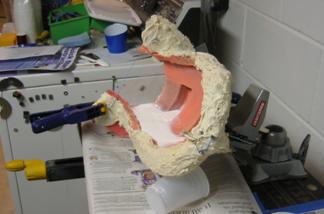
A profoundly blurry picture of the plastic-encased silicone sculpture, next to the Zebraman mask (mane missing). |
|
|
The plastic support shell taken apart, with the silicone sculpture removed and free to just flop around. |
|
|
Plastic casting. I had to tilt the sculpture to odd angles, pour a little bit of plastic, let it harden, and then tilt some more and pour again. Otherwise, there would have been no room for the armor to fit onto my arm. |
|
|
The result of my plastic casting. |

The right shoulder armor is the same, but in reverse. Actually, I did a few things differently: I strengthened the original plaster cast with Ultracal 30, and I cast it horizontally rather than vertically. I also changed the parting line of the plastic “mother mold” so it wouldn’t have the undercut that got it stuck.
Clothing
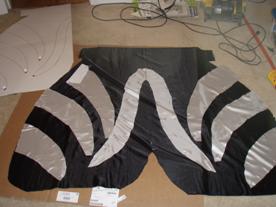
I don’t have a lot of experience sewing, though I have a sewing machine and a little bit of knowledge in how to do it. I made the shirt and pants from some sort of “Easy You-Can-Sew-It Easily” pattern I got at Jo-Ann Fabrics. I also drew out stripes that the original character had on his clothes, and laid them out.
Here’s a shot of what I had done by early February:
 I was sort of thinking about going
to MarsCon and entering it in their masquerade, but I wasn’t really done at
that point.
I was sort of thinking about going
to MarsCon and entering it in their masquerade, but I wasn’t really done at
that point.
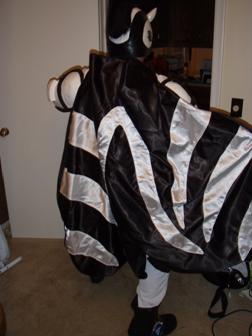
Oh, and here are a few shots of the cape, which I had finished by early March:
The Lobster Man who attacks Zebraman in a dream sequence
I realized that to have a good Masquerade presentation, Zebraman needed an enemy to fight. I picked a dream sequence in the middle of the film, where Zebraman fights a strange lobster-like creature that grows to immense proportions and cuts Zebraman’s arm off with his giant claw.
Besides, this gave me a chance to do some interesting engineering, with aluminum bars and other materials purchased at Home Depot.
|
|
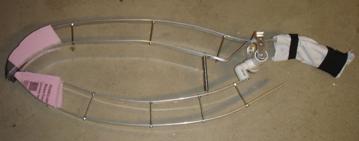
Here’s a first cut at the framing of the claw. I was originally going to structure it around the lacrosse glove, with the claw opening and closing by motion of the fingers in opposition to the wrist, but that didn’t quite work out. |
|
|
Here’s the version with the finished hinge, built mostly from plumbing parts from Home Depot as well as more aluminum bar stock cut to size. |
|
|
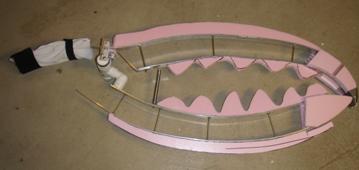
Defining the shape of the teeth and the claw. This is about the point where I went from two dimensions to three. |
|
|
Here I am attaching Styrofoam ribs to it, so I can put screen on top of it and define it in three dimensions. |
|
|
I originally did the top row of teeth in papier mache, with the far part of the claw in foam, but I didn’t like the way the foam was laid out. I eventually took out the foam and did all of the rest in fiberglass.
Also, I realized that Todd (my friend who was slated to operate this thing) wasn’t going to be able to open it with just hand pressure, so I added a motor at this point. |
|
|
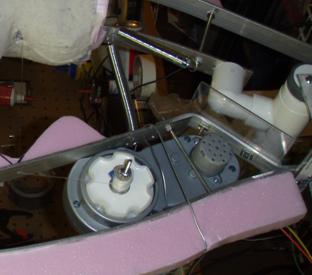
Here’s a closeup of the motor, which I bought at Ax-Man Surplus. It was originally part of a child’s toy car or something like that. It was nice and torque-y, but I had to experiment a bit to get the drive timing fast enough to close the claw without snapping itself shut. There’s a reversing switch in there so it can either open or close, and I wired a limit switch at the other end so it will shut the motor off when the claw is fully closed. |
|
|
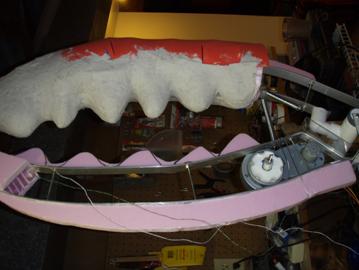
I’ve screened in the area around the forearm and motor, and I’m ready to fiberglass it in now. |
|
|
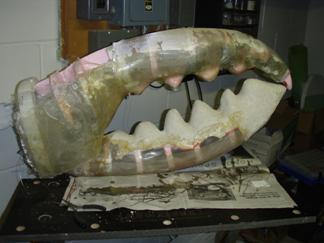
And here are the results of fiberglassing it in. (Tip: Don’t mix fiberglass resin and apply it in your basement. The smell is pretty strong.) |

Unfortunately, in our final rehearsals, the nylon line snapped, and it would have been difficult to string it back through. As it turned out, Todd found that it was easier to operate the claw with his hand than with the motor. So, all that engineering that I put into the motor drive system turned out to be unnecessary. (It was fun to do, though.)
Lobster Shell
For the most part, I built the shell from fiberglass resin applied to fiberglass cloth. I built forms for the cloth to stick onto, then draped the fiberglass cloth onto it. Then, it’s just a matter of mixing the resin with the catalyst, applying it to the cloth, and hoping the resin doesn’t drip onto the floor leaving a sticky mess. The smell of the fiberglass resin is pretty powerful, and I’m sure the Material Safety Data Sheet says something about adequate ventilation, not using it near an open flame, and not sniffing it for too long.
|
|
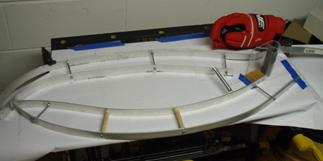
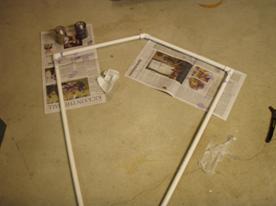
Forming the basic outline out of PVC pipe. |
|
|
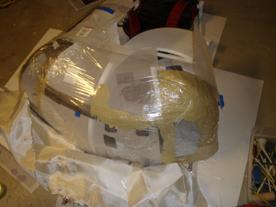
I’m making the basic outline of the shell from Styrofoam quarter-circles, plastic sheet, flexible metal screen fabric, clay, and whatever else will make a plausible shape. |
|
|
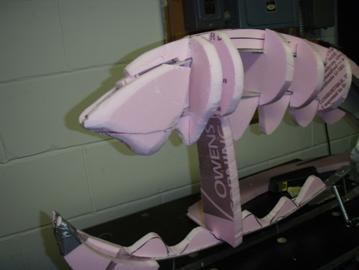
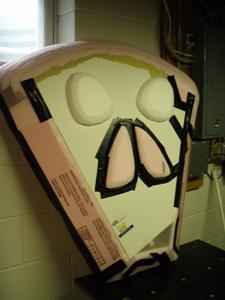
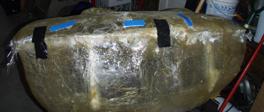
Here’s the form for the back of the shell, made from several thicknesses of Styrofoam built up to the curves I wanted. I’ve also added some detail (the round and vaguely triangular bits) with more Styrofoam. |
|
|
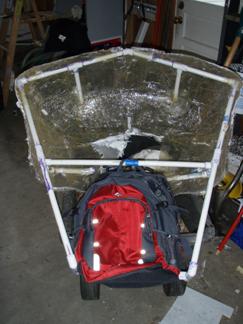
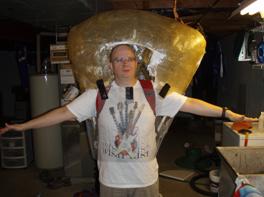
Here’s the top of the front half of the shell, mounted onto the PVC pipe that’s affixed to the backpack. The wheels on the bottom are because I had the thing sitting in my garden cart. |
|
|
Joining the front half to the back half. |
|
|
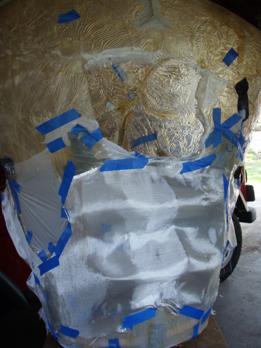
Here’s Todd trying on the shell so far. I’m using screen wire to draw out and mold the bottom half of the front section. I decided to cut out and mold that part separately. |
|
|
Here’s a picture of the bottom half of the front section. I did a first layer conforming to the screen wire, so this is a second layer that has bumps, ridges, and other interesting details. |
|
|
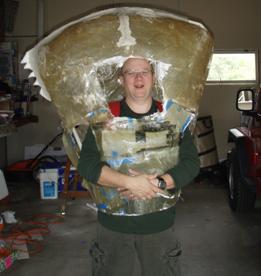
Todd is trying on the shell in a mostly-complete state. He appears to be happy about the way it fits. |
|
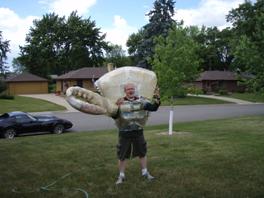
|
Maybe he’s a little too happy to try it on. He just had to go prancing out on my front lawn while wearing a giant lobster shell and a giant lobster claw. I live in a rather normal neighborhood, so seeing people wearing lobster costumes is unusual. Fortunately, I only had to explain this occurrence to one of my neighbors. |
|
|
And here’s a mostly-final picture of the shell after filling in a bit near Todd’s face and painting it. On the left, you can see some antennae or leglets or whatever lobsters have. I could look at Wikipedia to get some more details, but I was more interested in reproducing what the movie had to show. |
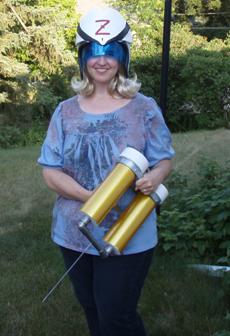
Zebra Nurse
Zebra Nurse is the heroine who comes to save Zebraman in a dream sequence. After the lobster man attacks Zebraman, he calls for Zebra Nurse, who just happens to be the mother of the school student. There’s sort of a love triangle happening in the movie. Zebra Nurse comes out with a giant syringe and injects Zebraman with it, healing his arm.
My friend Kate made the dress (which she is not entering in the competition). I made a Zebra Nurse helmet and the giant syringe. For the helmet, I took an old motorcycle helmet and sculpted the top front ridge thing in clay, then molded it in silicone (Smooth-On’s brush-on silicone kit) and cast it in the same plastic as I used for the shoulder armor and the front armor.
|
|
Unfortunately, the helmet under construction fell off the vise and onto the floor soon after I cast the first coat of silicone onto the structure. I had to cut the first layer of silicone off and repair the clay sculpture.
To say I wasn’t a happy camper was a bit of an understatement. I had to open the windows in the basement to clear the air of my profanity after this episode. |
|
|
Fortunately, I was able to effect repair. |
|
|
Here’s the result: The floppy silicone sculpture on the left, the plastic “mother mold” in the center, and the motorcycle helmet on the right. |
|
|
Casting plastic before I put the helmet sculpture back onto the helmet. I wanted to make sure this part worked. |
|
|
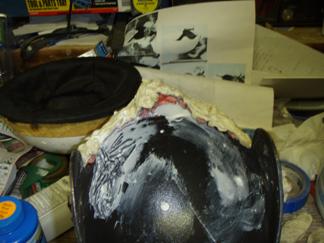
I assembled the silicone mold and mother mold onto the helmet and then filled the remainder from the inside, through three holes drilled into the motorcycle helmet.
This helmet is probably no longer safe for motorcycling on the public roads. It probably wasn’t even all that safe when Paul gave it to me. |
|
|
Oops. After casting it, there was a divot on the right side of the sculpture. I think the silicone hadn’t been pushed into the mother mold all the way. |
|
|
Fortunately, I was able to fix it. I learned something about filling cavities from my local dentist. |
|
|
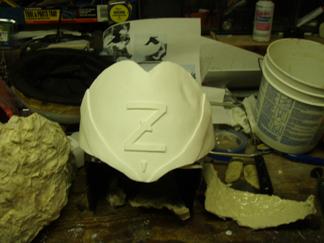
Here’s the finished product, after painting and with the blue plastic visor installed. (It’s really a clear piece of Plexiglas with a thin blue PVC sheet on top.) |
|
|
I didn’t take any construction pictures of the giant syringe, but here’s Kate posing with the finished syringe. It’s two lengths of PVC pipe strapped together with steel bands, along with pipe fittings on the ends and a PVC pipe “manifold” connecting the two cylinders to the long, painful needle. The gold coloring is Monokote, sold at Hub Hobby as a way to decorate model airplanes. It adheres to itself (if you iron it) and shrinks to fit, making this job easier.
I appreciated not having to sniff gold paint fumes. |

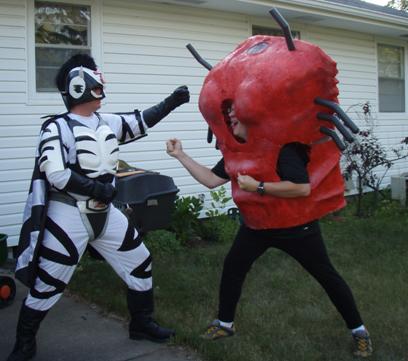
And, here’s one final action shot of a rehearsal between me and Todd Madson (Lobster Man), done in my back yard:
After CONvergence, I plan to become a real-life superhero, patrolling the streets of downtown Minneapolis at night guarding against any alien attacks, or at least attacks from the kind of villains who hang out after dark. I’ll have to learn how to perform “Zebra Bomber”, “Zebra Double Kick”, and “Zebra Screw Punch” first. Oh, and I’ll have to learn how to fly. On second thought, I’ll stick to the masquerade circuit.